I was invited to a 1920s themed party a little while ago and instantly felt that the theme demanded the construction of an electronic exploding zeppelin costume.
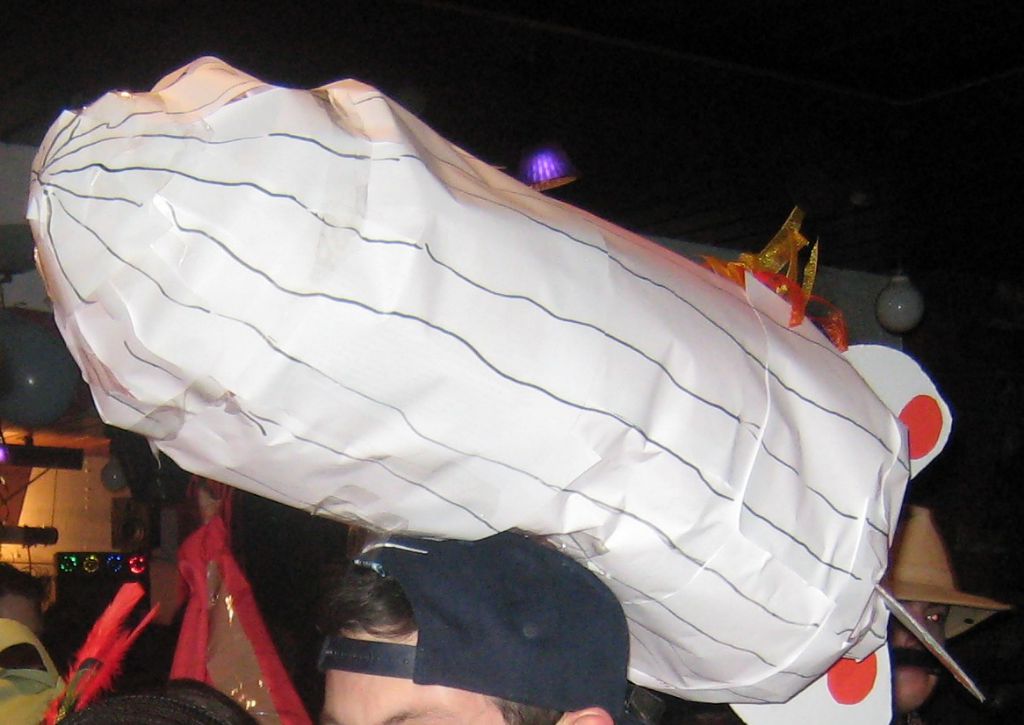
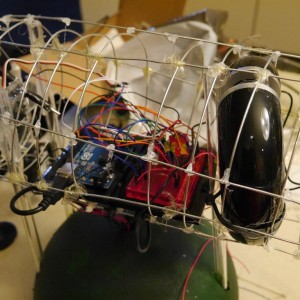
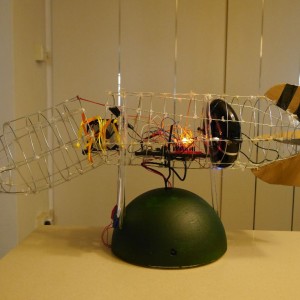
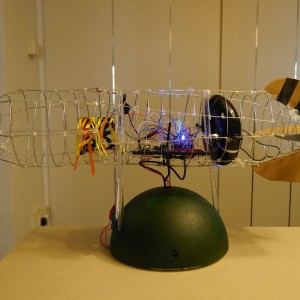
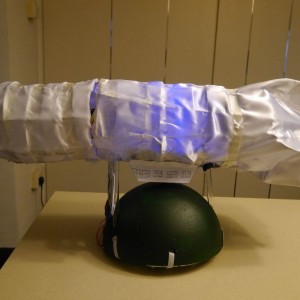
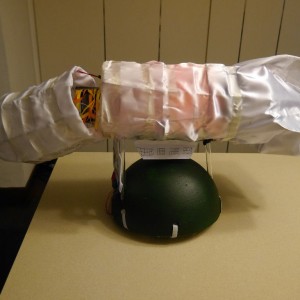
The finished zeppelin helmet
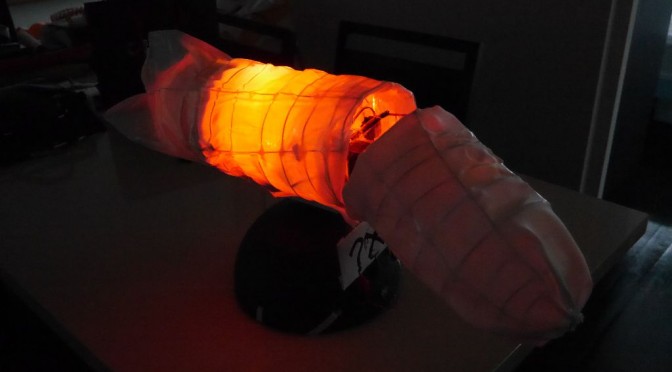
Why a zeppelin? Firstly because they are inherently cool. Secondly as a nostalgia trip – this is the second zeppelin helmet I’ve constructed. The first was for a student party in 2007. To make it interesting and distasteful I decided to depict it as being on fire. That meant including a glowing red LED inside and a fan that blew ribbons out of the top to make a flame effect (as well as a satisfying whirring noise). It was a simple circuit with a switch to turn it on and off.
I felt that the availability of all kinds of fancy and easily accessible electronics should allow the 2014 version to be much more sophisticated. The features I incorporated were:
- Controls made from conductive ink connected to a Bare Conductive Touch Board
- A servo motor to make the zeppelin seem to snap in two when the explosion took place
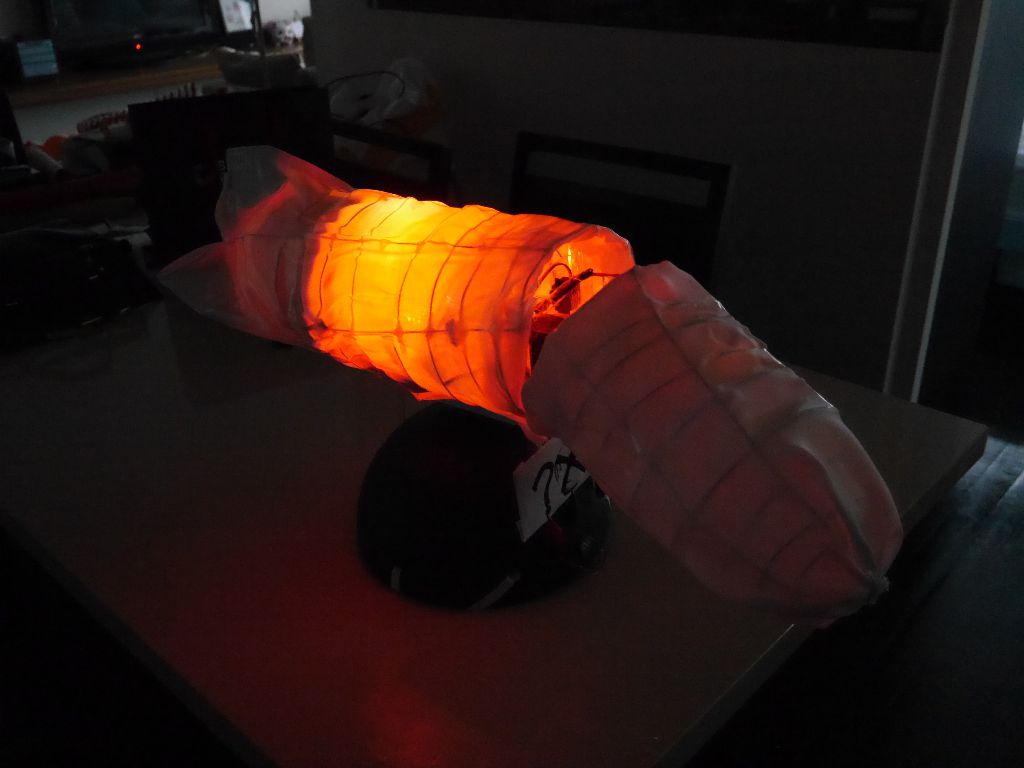
- Flickering, colour changing lights to make it more flame-like
- A fan blowing flame-coloured ribbons
- A speaker and mp3 player (integrated into the Touch Board) to allow it to make sound effects
- As with the original, an unfortunate similarity to a certain part of the male body that people are generally unable to resist pointing out after two drinks
It was built over the course of a weekend plus some weekday evening touchup. The construction can be roughly split into four stage: structure, electronics, firmware and final assembly. There was a procurement phase which consisted of wandering around a craft shop buying stuff that might be useful. For the basic design I drew out a template structure based on a picture of the Graf Zeppelin. I considered using the Hindenburg as a model but it was only built in 1936, so it wasn’t really suitable for the 20s theme.
Structure
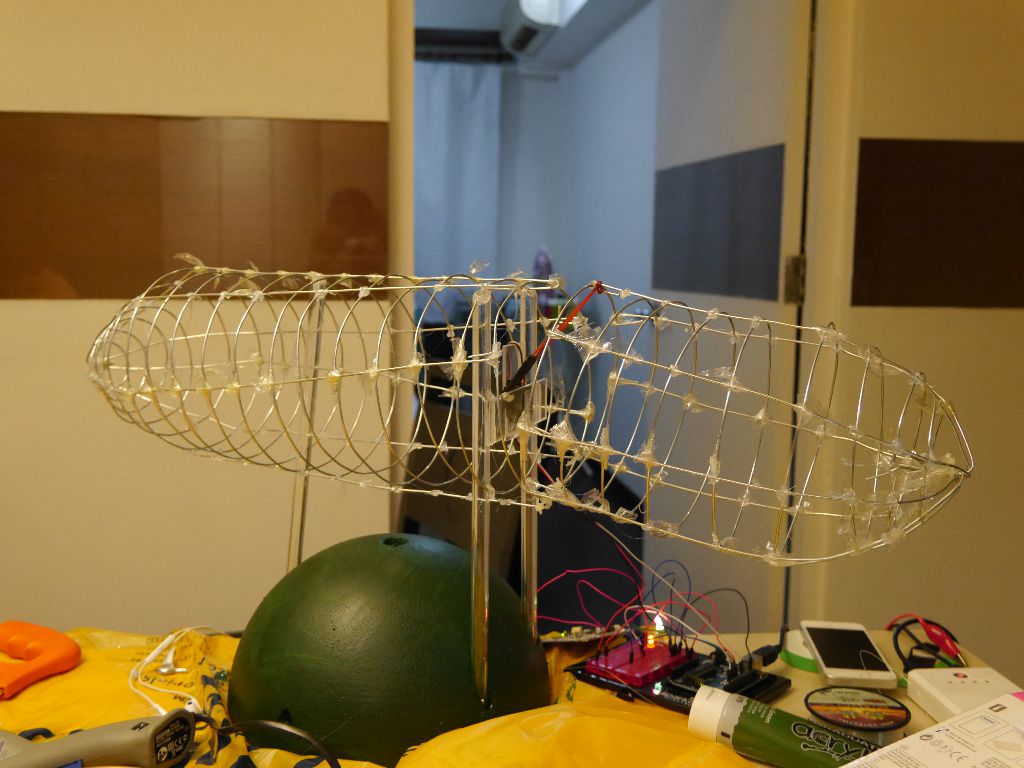
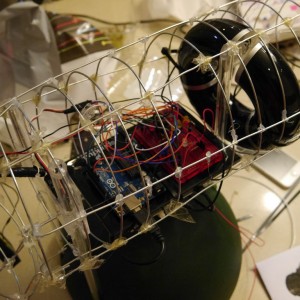
I needed a helmet to form the foundation of the rest of the structure. This was made from styrofoam half shell, into which I put three perspex tubes to act as supports. The styrofoam shell was one of many weird and wonderful sytrofoam shapes available at our local art shop. I painted it green to make it look vaguely grass-like. I then bent, cut and joined wire to form the shell of the zeppelin.
The “I” is not strictly accurate – much of the actual work was done by volunteer/conscript labour in the form of The Wife and a very good friend who came to visit us in Singapore. When our friend left the UK to visit us she probably had very little suspicion she would spend a good part of her holiday on airship construction.
I drew out the shape to scale and worked out the various diameters that were needed, then the conscripts cut wire to the right length and bent them into rings. We then attached the rings to longer pieces of wire that ran the length of the airship. This was the toughest part. We used sellotape which was a very poor choice as it tended to unravel – if I was doing it again then I would use small cable ties for all the joints. I used hot glue for some joints but this was not too effective because you need to apply force to each joint to hold it in place while the hot glue cools and your fingertips burn.
Once the two meshes were complete I cut grooves in the perspex tubes and attached the larger back mesh onto them. I attached the smaller front mesh to the back mesh with some cable ties to make a hinge at the bottom.
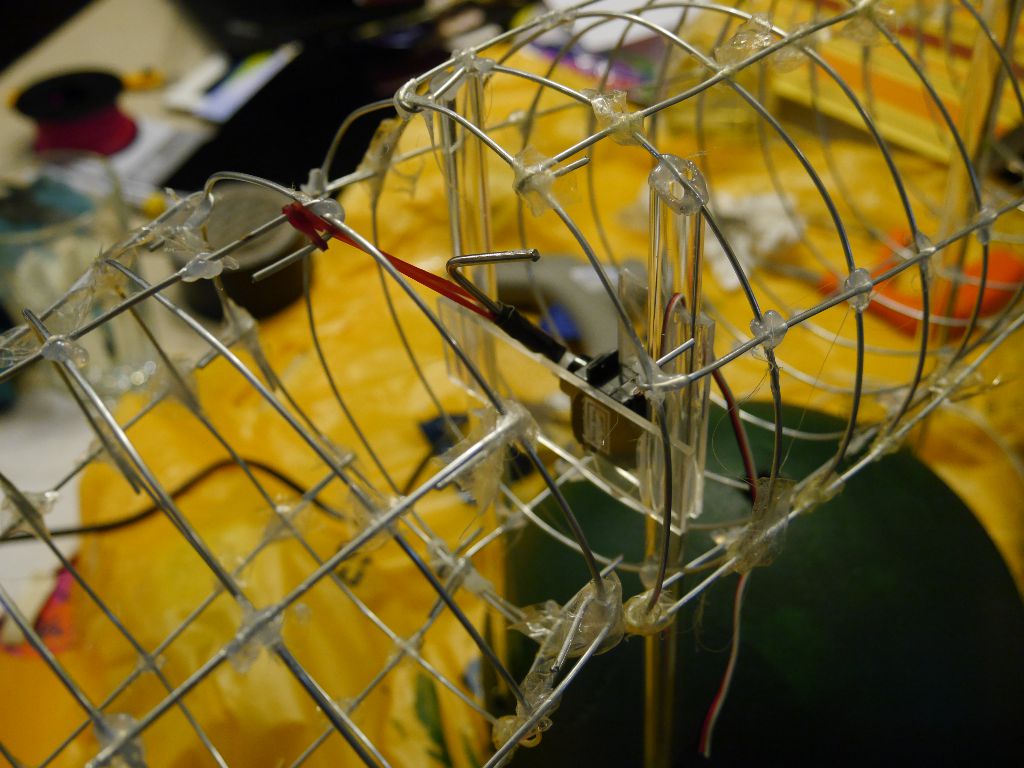
Electronics
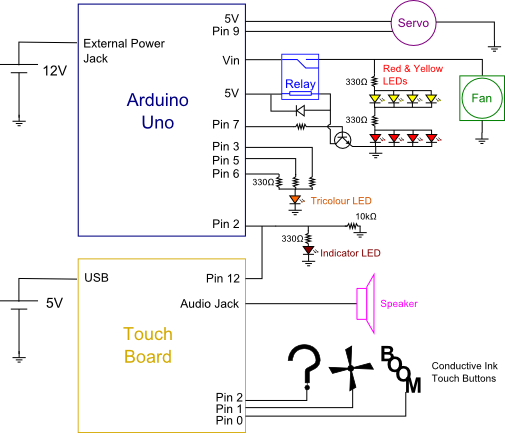
The electronics were made up of an Arduino Uno, the Touch Board and a solderless breadboard that came with my Sparkfun inventor’s kit. The Touchboard automatically does all the clever electronics to sense when someone is touching a block of conductive ink. It also has a built in mp3 player. The Arduino Uno drives the rest of the electronics. I probably could have done everything on the Touch Board if I wanted but it didn’t come with any headers, so it was easier to just solder as few wires to it as possible and do most of the i/o on the Uno.
Here’s the schematic of how the boards were connected together:
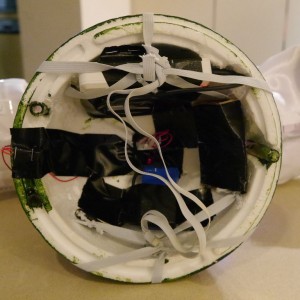
And here’s what it looked like before being installed into the shell:
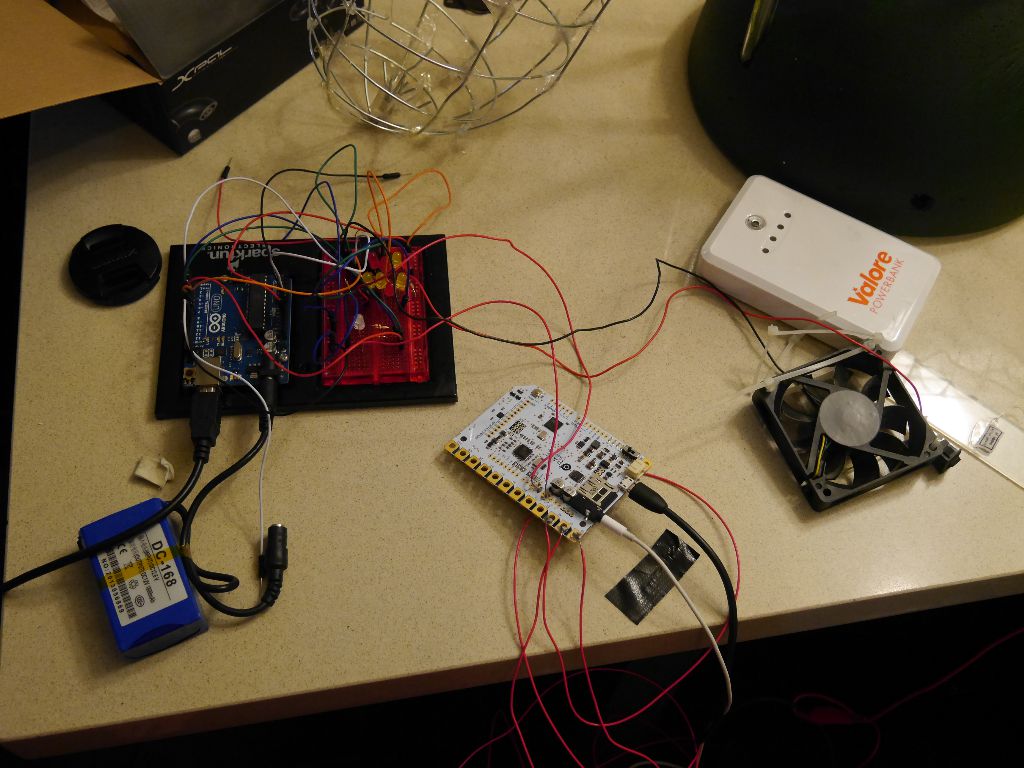
I taped the touchboard to the bottom of the Uno’s plastic base and installed it into the shell. For the sound effects I was lucky enough to find a donut shaped speaker with an internal amplifier and battery that fit inside the shell very neatly.
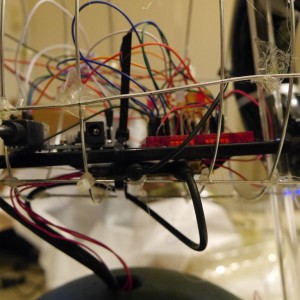
I attached the servo motor to the frame using lots of hot glue and some perspex left over from the printer case disaster. To make the servo reach longer I used a metal cocktail stirrer glued and duct-taped to the servo arm. It was linked to the front shell using a rubber band.
Firmware
My arduino sketches for the costume are on github. To upload the sketches I used Bare Conductive’s helpful tutorial on how to set up arduino IDE with the Touch Board.
The main challenge I had when writing the sketches was working out how to change the colour of the LED while simultaneously listening for an input. The “Blink without Delay” example on aruduino.cc gave me the solution.
Final Assembly
I used some leftover fabric to put the skin on the zeppelin. I found the best way of making it follow the curvature of the shell was to gather the fabric together with a cable tie at the front/back of the shell and then trim off the excess. I made some cardboard fins for the back and made the fabric follow their profile by using double sided foam tape.
I drew out the conductive ink pictures to control the zeppelin on a piece of paper sellotaped to cardboard. As well as the “BOOM” switch that made the zeppelin explode I included two other switches that played alternative mp3s. The question mark triggers a voiceover explaining what the costume is, the thing in the middle is meant to be a propeller and makes a suitable prop-plane sound. I found the sound files for the explosion and the prop plane online.
Demo of the other sound files
The worst bit about assembly was trying to get the batteries etc. to fit inside the helmet in such a way that I could still wear it. In the end I chiseled out some recesses for the batteries and bodged them in place with hot glue and tape. I used some elastic straps to keep it on my head – no mean feat as it was quite heavy. I needed one pair of straps at the front and one at the back joining with a chin strap to keep it all stable.

Results and learning points
I had a couple of hours before the party to test everything and it all seemed to be working fine. The LEDs produced a really nice flame effect in the dark and the touch sensitive conductive ink worked really well. It was even possible to balance the monstrosity on my head with something approaching poise.
Once I’d finished testing it I tried to give the batteries a top up. However everything was already plugged in and difficult to access inside the zeppelin skin, so I had to give up and hope the batteries would last the night. Predictably they ran out within ten minutes of arriving.
The sound effects still worked but the 12V battery powering the uno wimped out, leaving my zeppelin looking decidedly limp. It was a bit disappointing, but I was still pleased that I was able to have a working costume and I learnt a lot from this project about arduino.
Next time I’ll…
- Resist the temptation to use tape as a structural element, it never works properly
- Put more thinking into how I build stuff so that it can be easily taken apart for access to electronics etc.
- Charge the damn batteries