
3D printing is, of course, the most frustrating hobby in all existence. Browse through any 3D printing forum and alongside the beautiful prints you’ll come across posts that compress incandescent rage into a few choice words like “I’m throwing my ******* printer out the window”. In my case most of this rage comes down to keeping the printer properly calibrated, in particular keeping a correct height for the first layer. 90% of my failed prints fail because of some issue with the first layer, and often it is because the height is wrong. In theory you should be able to set the height correctly using the time-honoured piece of paper technique, but it always requires a little bit of dialing in for the best quality. This post describes a way of simplifying that dial in process by printing multiple test pieces in a single print with a range of starting heights.
To properly dial in the height I will start with the paper method, then print a series of single layer test pieces at a variety of different heights. Each time I adjust the probe offset with the M851 command and then inspect the resulting parts to decide which looks best. This process is very time consuming, especially since with my fancy new self-leveling system the printer has to do 9 bed probes before it even starts printing. To speed up the process I wrote a script that will take the gcode that the slicer generates for the test piece and create copies in an array, with the z height adjusted slightly each time. Now all I need to do is set the initial z height at a value I know too low, set the printer going on the calibration file and come back after a cup of tea to see a neat array of prints. I can choose the one that looks nicest and just make one change to M851.
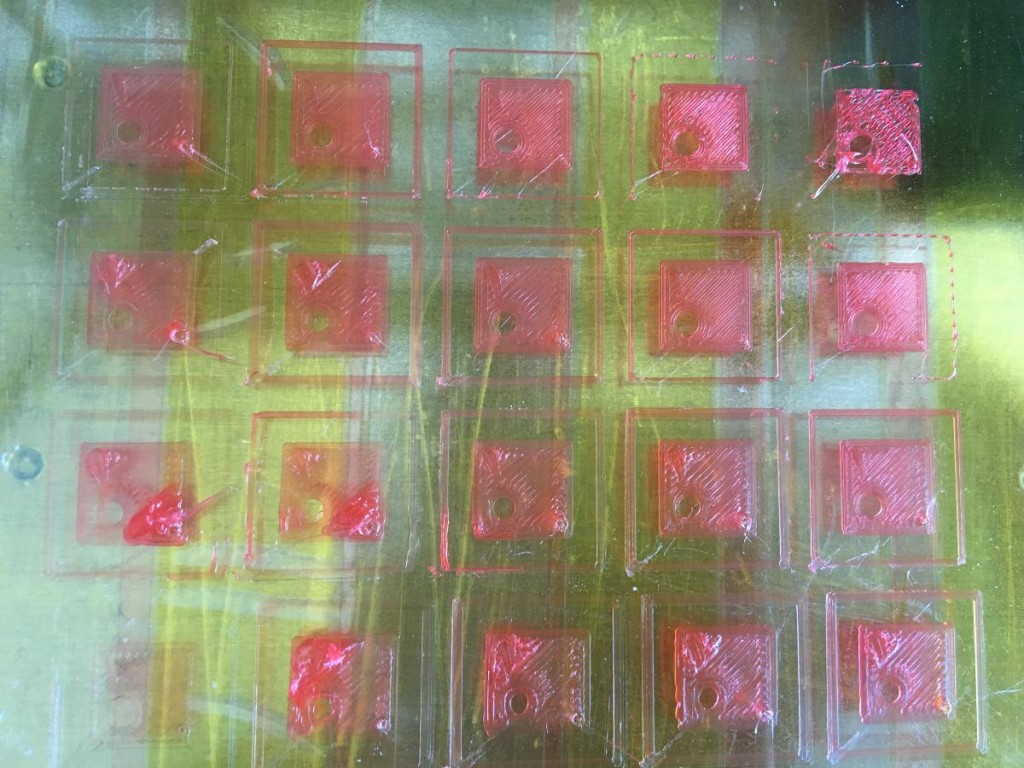

In the example above the 14th example is the nicest. It has no gaps between the infill but also doesn’t have the slightly furrowed effect you get when the nozzle is pushing plastic out of the way as it moves. The process for resetting the height is:
- Check the current probe offset with M851. In my case is it is -21.40mm
- Check what height the 14th example corresponds to. I set the array to be at heights from 0.00mm to 0.38mm at 0.02 intervals, so the 14th example is 13*0.02=0.26mm
- My starting layer height should be 0.20mm, so this is telling me that the current settings are 0.06mm too low. Set the new probe offset accordingly. In my case I need to add 0.06mm so the command is M851 Z-21.34
The script is on github here, there are instructions in the file on which parameters to change. The overall approach is to parse the text in the original gcode file, find any references to X or Y coordinates and adjust them to position each piece in the array correctly. The height is adjusted by replacing the reference to it in the gcode with <0>, so that the script knows to insert the 0th variable there.
The same script could be used to dial in other parameters, e.g. hotend temperature. It would be nice to expand the script so that it can also deal with multi layer prints. Cura signposts each layer with a comment so this should be feasible.
If you look at the photo above closely you can see that there is one issue with the approach. It assumes that the print bed is the same in all locations, i.e. that it is level and has a similar adhesive performance (amount of hairspray). In theory the bed should effectively be level because of the autoleveling feature, however you can see that the prints on the left hand side are more squashed than the ones on the left hand side. To show this more clearly I printed another array where all the pieces were at the same height.
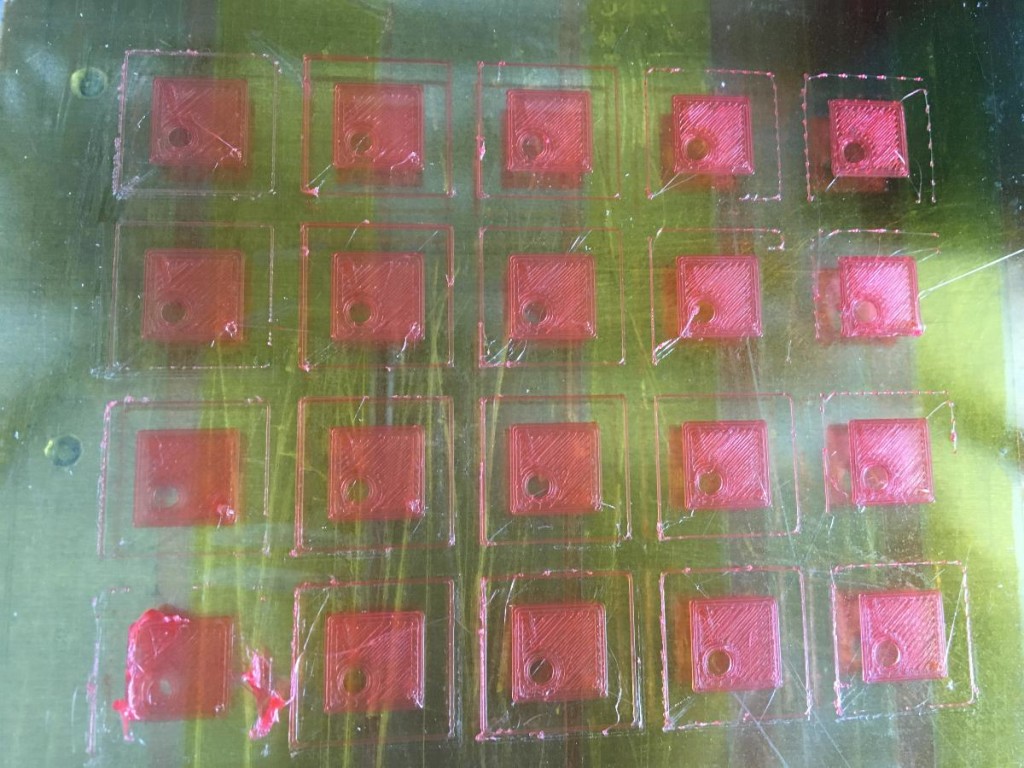
Based on this print it looks like my bed leveling is off, with the bottom left being higher than the top right. Why this might be the case is a mystery for another day.