In this post I’ll describe how to make custom cut name cards for contact details. The Wife and I just moved from Singapore to the US where we are meeting lots of interesting people, so unusually for this blog the project served a practical purpose.
For the Wife’s last birthday I got her a Cameo Silhouette II to make crafty things with. It’s a machine that attaches to your computer and then can cut paper, fabric and card with eerie precision and intricacy. It sits perfectly at the intersection between Geekery and Craft in the great territory of Making Stuff, so we were both very interested it. We experimented with it a bit before Christmas and after a few failed attempts managed to get a very pretty decorative “Merry Christmas” plaque. However, the card we used sells by the sheet and was very expensive, so I have been on the lookout for some good quality card that the Cameo will play nicely with and which comes in a cheap pack.
To use the Cameo you first stick the card to a reusable plastic sticky cutting mat. You load the mat into the machine. It then feeds the mat in and out to get the y movement, while moving a blade across the width of the mat to get the x movement. If the card is too thin then fine details either get torn up by the blade or will tear when you peel it off the sticky mat. If it’s too thick then you might not cut through it at all or might even break the Cameo’s blade (fortunately I haven’t done this yet). Also, not all cards of the same thickness are equivalent. I found some photo mounting card that seemed to be the ideal thickness, but it was made up of two surface layers with a weak binding material between them. It came apart into two layers when peeled off the mat and made a mess.
After some experimentation I found Astrobrights premium cardstock 80lb (216g/m²). I bought it in Staples for about $11 for a huge pack. With this card the following settings produced good results for me:
- Cut Edge
- Cardstock
- Blade number 5
- Speed 3cm/s
- Thickness 33 mysterious unnamed units
- Double cut (not essential but makes it much easier to remove cut out pieces)
Discovering card and settings that worked completed my husbandly duty, but I couldn’t resist borrowing the Cameo a bit longer to try cutting some name cards. The Cameo comes with a decent software package for drawing designs and driving the cutter. However, since I am used to using Inkscape for 2D stuff I scoured the web for ways of drawing in Inkscape and then importing to Silhouette Studio to do the cutting. Silhouette Studio can import svgs if you buy the premium edition, but you can do the import as a dxf instead and save some cash.
The process is…
- In Inkscape create a new document sized in pixels. Set the base unit in document properties to pixels too. From now on pretend that pixels are mm and forget about the physical dimensions. I had lots of problems getting the size right during the import and this was the only way I found that worked
- Create a rounded rectangle. If you want to make a standard business card size you should make it 89px by 51 px (which will end up being 89mm x 51mm or 3.5″ x 2″)
- Type out the text in your chosen font over the top of the rectangle. You will need a stencil font or you will lose pieces like the central portion of an “o”, “a”, “e” and it will look strange. Also fonts with lots of straight edges seem to cut faster. There is a good selection of stencil fonts here. For OS X you just need to double click on the downloaded font to install it (need to restart Inkscape). I used the Scriber font which The Northern Block has kindly made available free. Because of the small size of the rectangle you will need a tiny size for the font (around 10 for the name)
- Once have font size and position right save a copy of your file as an .svg because the next step can’t be undone and if you want to edit your text later you’ll need to come back to this point
- Convert the font and the rectangle to a path (Path->Object to path)
- Ungroup the font, you should see that it has been turned into lots of paths (you now cannot edit the text). These paths are just layered on top of the rectangle path. Now that I am writing this up it occurs to me that you could probably already go ahead and export to dxf at this point if you are just going to use the Cameo, however because I’m used to using Inkscape for preparing paths for extrusion in OpenSCAD I preferred to combine everything into one closed path that has a clearly defined inside and outside
- Combine the font paths (Path->Combine)
- Select both the rectangle and the font and perform a difference operation (Path->Difference).
- Save a copy as dxf. In the dialogue box that comes up select pixels as the base unit
- Set all of your dimensions in Silhouette studio to mm
- Open the .dxf file in studio, it should turn out the right size
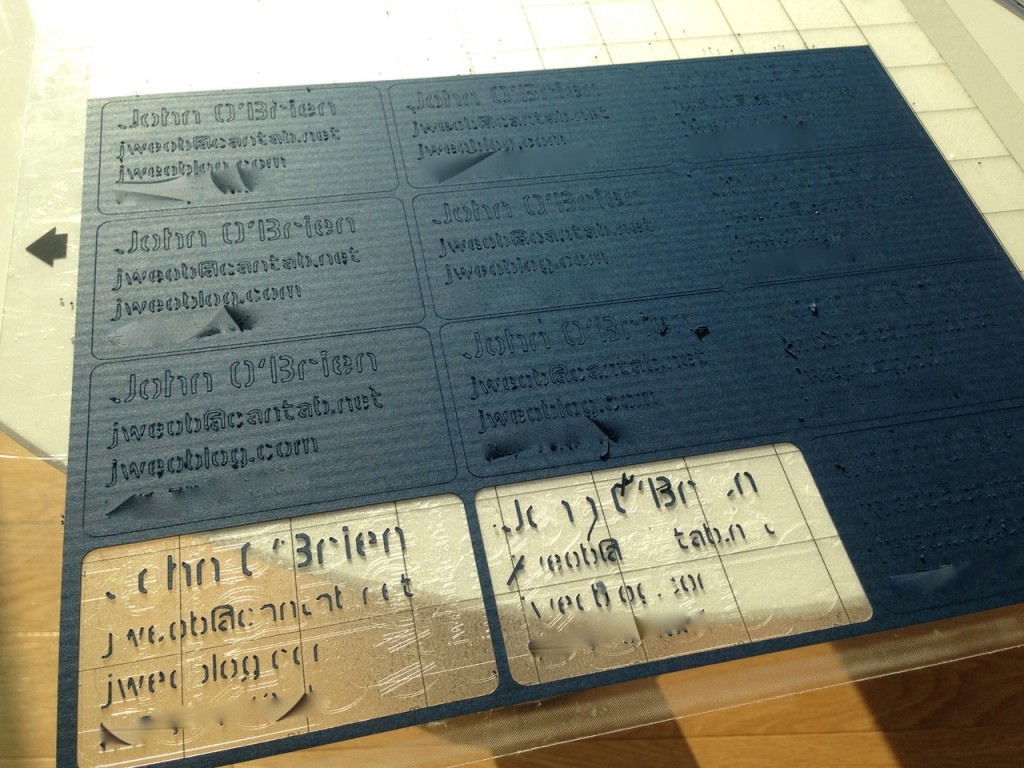
- Arrange copies of the name card. You can get 12 name cards on one 8.5″ x 11″ piece of card if you turn them on their side and make 4 columns
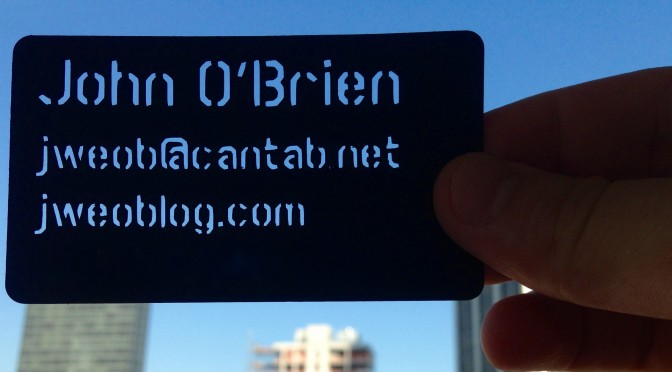
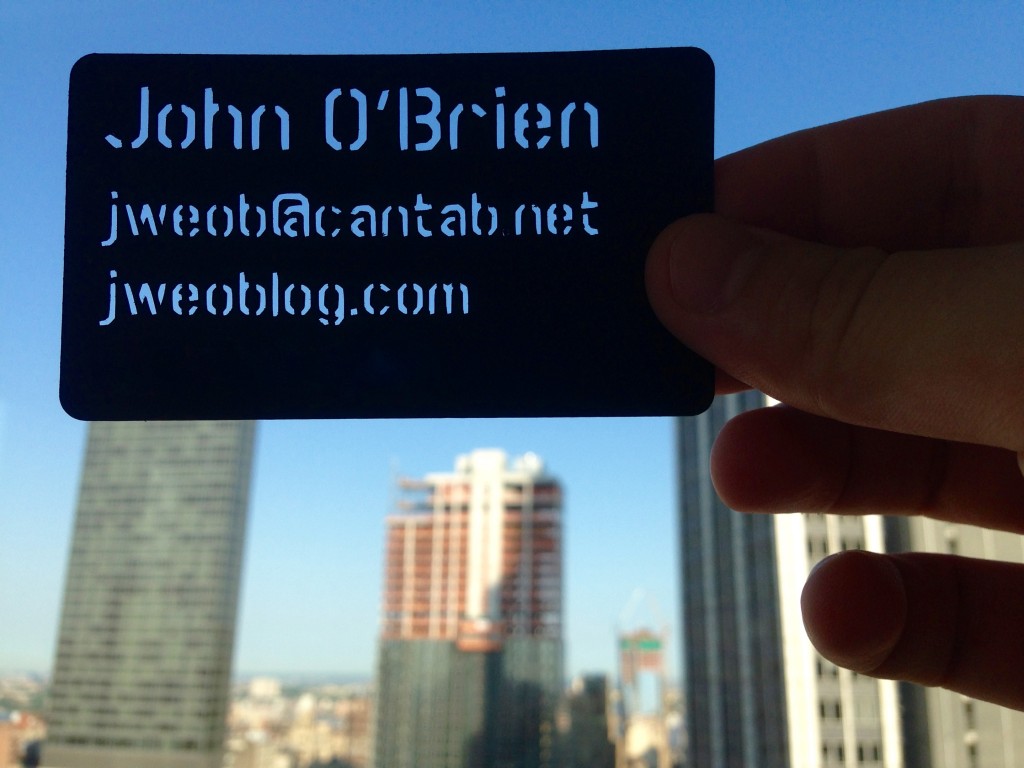
- Set up the cut settings as described at the start of the post. If you are using double cut then it should peel off the mat 90% complete – you’ll just need to pull off a few straggler pieces of card that are caught inside some of the characters. My initial idea was to paste the cut out on to a backing so that the text was very clear, but once I saw the card I decided it was cooler to be able to see through it
- Scrape the mat clean with a credit card, remind yourself that the Cameo is a present that you bought for the Wife and not your toy, put it away with great care and attention
- Start handing out name cards!
Here are some pictures of the finished result. I have retouched out my phone number, hopefully the email address is too much of a challenge for spambots.
PS I almost lost this 1000 word blog post because wordpress gave me a 404 when I tried to preview it. I recovered my form submission using a great technique described here
One thought on “Custom Cut Name Cards”