Please internet, fix my circuit

I have never had much success with analogue electronics. This weekend I wasted 6+ hrs trying to get a pretty simple circuit to work. Then I fried the parts so I can’t work with them any more, this at least is a blessing as it can no longer suck up time and generate additional frustration. I’m going to record the measurements I was able to make here so that I don’t forget what I have already tried (and maybe some kind soul might tell me what I am doing wrong…)
Continue reading

Stealth Printer II: The Case

In my last post on stealth printing I described how I set up pronterface and VNC on a Raspberry Pi to control Squirty from an iPad. This lets me have the printer set up anywhere in the house rather than having it at my desk in the bedroom. Having it in the living room makes overnight prints possible but not ideal, as there is still quite a lot of noise from the stepper motors and fan. The solution is a case to cut down on noise, and to make the printer Look Cool.
Continue reading

On the restorative use of hairdryers in additive manufacturing

In my last post I wrote about the problems I experienced trying to print the dial gauge holder. The belt kept slipping out of the x-carriage causing the print to fail. Each time it failed I dutifully took the carriage apart and put the belt back. I even put some tape on the bottom side of the belt to thicken it and push it tighter against the teeth that hold it in place. After doing this I would take a look at my handiwork, pull the belt experimentally and feel certain that no force on Earth could cause it to come loose again. Then it would happen again. The belt that had seemed to be firmly gripped in the x-carriage would slip out as if there was nothing holding it in place at all.
Continue reading

Dial Gauge Holder

Many 3D printing forums and blogs lecture on the quintessential importance of a perfectly level print bed. Achieving this state of printing nirvana is however a tedious and difficult task. Checking the height of the bed at various points requires you to move the print head to that position and then carefully lower it until it is almost touching the bed. You can then note the position by sending an M114 command to the printer. Continue reading

BeerBot

Working to  connect a Raspberry Pi to a reprap made me think about resurrecting my BeerBot project. I worked on this in 2012. It is a robot made of a lego mindstorms kit with a raspberry pi sat on top of it. The pi acts as a mini web server broadcasting images from a webcam at the front. The robot can then be steered using SSH and can pick up beer.

The video shows the BeerBot eventually picking up a can of beer. It’s being steered using a python program run over SSH (you can hear the typing in the background). Please excuse the loud warthog-like breathing sounds.

Continue reading

Stealth Printer I

3D printers make a lot of noise. The noise can have an almost musical character, especially when it is printing circular objects, however its musicality tends to wear off if you are be exposed to for long periods. Unfortunately 3D printers are also very slow. A big print can easily take 12 or even 24 hours. Noisiness for long periods leads to sleep deprivation and marital stress, so I have been trying to find ways to make printing as quiet and unobtrusive as possible. Continue reading

Something useful

One crushing criticism that has been aimed at home 3D printing is that it has no real practical use. People who take this point of view usually claim that far from being the vanguard of a new industrial revolution home printers are actually only really used for producing deformed yoda heads. In this post I utterly refute this argument with a demonstration of a truly useful object created using my printer.

Continue reading

Minecraft donuts

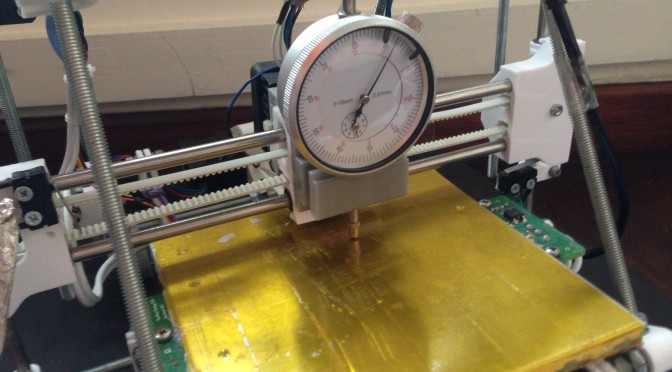
One of the most common questions that people ask you when you tell them that you have a 3D printer (shortly after they ask you can you print a gun) is how accurately can you print? My answer to this question has always been stolen from RepRapPro’s specifications page where it describes the accuracy of the RepRap Huxley as 0.1 mm. The various trials and tribulations that my friend Rob has experienced while assembling a 3D printer made from Squirty-printed parts has made me re-examine the answer to this question.

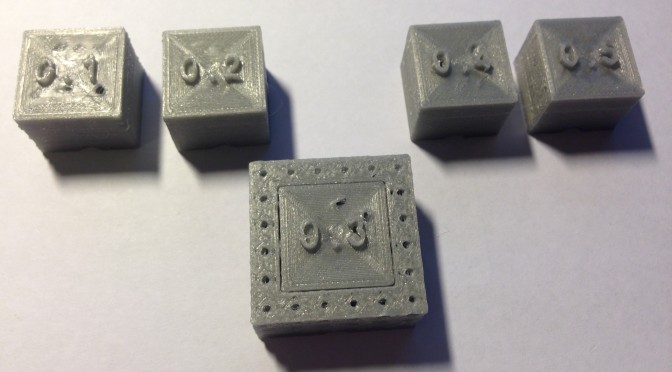
Rob suggested that I test the tolerance of the 3D printer by printing what he described as a Minecraft (TM) doughnut. This is a bit like a doughnut, only square. After printing one I could measure the inner and outer dimensions and compare it to the dimensions in the design to understand what the tolerance of the printer is. The idea of having an inner and outer dimension to measure is that you can tell if the plastic squidges slightly outside the boundary of the part – if this was the case the outside of the doughnut would be too big while the hole would be too small. This post describes my adventures with the aforementioned Minecraft doughnuts. Continue reading